If your WordPress theme includes the function of adding a custom default blog header, you have the chance to customize it without needing to have fumble around in any source code or, because of the included resize tool, open a single graphics program. Here’s a short explanation of how you can add a new default header image in wordpress.
Which Size Does Your Header Image Need to Be?
Basically, you can upload any size image you want because you’ll be able to crop it using the built-in WordPress crop tool, but this depends greatly on your upload limits (Mb) and on the speed of your connection. The best tip is to upload a sensible size, that would be either exactly the right size, in Twenty Ten 940 x 198 pixels, or somewhere “around” the size you need. For example, if your header image is 1024 pixels wide, then an image up to 1600 pixels wide to upload would be ok, a good place to look which size you need is in the default header image settings.
WordPress Default Header Image
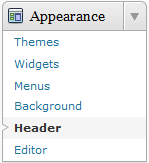
 You can find the settings for your default header image by opening the “Appearance” section, in the left navigation panel, and clicking on “Header”. The current default header image will be displayed in the preview section at the top of the page. Information about the image size, together with a form for uploading a new image, is in the middle section. A selection of alternative images, if available, are displayed in the lower section.
You can change the default image by either choosing one of the predefined ones or you can upload your own custom designed one.
Change the Image by Selecting an Alternative Header Image
To use one of the pre-defined header images, simply select the radio button next to the image that you want and then click the “Save Changes” button.
Upload Your Own Custom Image
 Your own image can be uploaded using the upload form, the size of the image that’s used in your theme is also likely to be displayed here, look for the text: “Images of exactly 940 x 198 pixels ….”.
Simply click on the browse button, choose your new image from your computer hard drive and click upload. The image will be uploaded to your uploads folder. Resized versions will also be created, as set in your Media settings.
Just the Right Size
If the image that you upload is exactly the correct size, it will appear in the preview section at the top of the page as soon as the upload is finished, and you’re done. If the image has another size, you’ll be able to crop it.
The Wrong Size Image
 It’s absolutely ok to upload an image that doesn’t have the exact size, WordPress has a simple crop tool with which you can crop the image to the right size. After uploading the image you’ll be shown the “Crop Header Image” section.
Move the cropping area by dragging your mouse inside the selection (see the top, left screen shot). To resize the crop area, place your mouse over any of the sides until the cursor changes to double edged arrow (see the bottom, left screen shot), then simply drag the side smaller or larger. Play around until you get the crop area that you’re happy with then click the “Crop and Publish” button.
Black Image Day
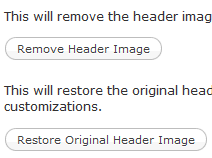
If you click outside the dashed box of the cropping area by accident, the crop session will end and you’ll get a blank image, ok, that’s not what you wanted ;) but no need to worry, delete it using the “Remove Header Image” button then just start the upload routine again.
Note About Small Images
Even small images can be uploaded, WordPress will happily use these too, but, he will also happily stretch the image to the size he needs before saving it. Stretched images tend to look unsharp, blurry and pixelated, as shown in the screen shot below. If this isn’t what you want then always use an image of the correct size or larger.

Where Is Your Header Image?
Custom header images are uploaded to your uploads folder. Here, a set of resized versions, as set in your media library options, will also be created. If you used the crop tool to crop the image, it will be uploaded with the prefix “cropped_”.
Your new image will now be displayed and used by WordPress as the default image. As long as you don’t have a custom featured image on a page or post, this image will be displayed.
You can override this per page or post by uploading a featured image.
Removing a Header Image
 To remove a default header image, click the “Remove Header Image” button. Then either upload another, choose a predefined or restore the original image by clicking “Restore Original Header Image”.
Unfortunately, WordPress doesn’t save custom uploaded images in the admin section, so if you change your mind after removing you’ll need to upload it again. It does not, however, delete the files created, these will still be in your uploads folder; files that were uploaded with exactly the correct size will have their original name, images that you cropped with the cropping tool will have the prefix “cropped_”
And then you’re done.
For the Brave, but not for this Article ;)
You could register/add your new images to your theme’s functions file, that way they’ll be displayed as predefined options that you can choose any time.

 Create professional websites and online shops without programming:

