The built-in blogroll function in WordPress allows you to add links to other, usually related theme blogs giving your readers to extended resources of information, tips and help. With just a few steps you can set up and a blogroll to your side bar through the widget section.
The first thing is to collect a list of links that you wish to add, these can be anything from blogs that discuss related topics or blogs that discuss complementary topics, or even blogs of friends or acquaintances from your social sphere. Once you’ve collected your links you can build your blogroll.
Create an Individual Blogroll
 In WordPress you can create any number of blogrolls, this is done in the links section. Simply log in in to your admin area and click on the side bar navigation “Links” to access the links section, then choose “Add New”.
First things first – Blogroll Options
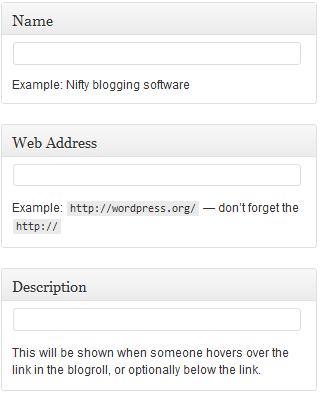 The first things you’ll want to add are “Name”, “Web Address” and “Description”:
Name: give your link a name. Choose this carefully as it’s used for the link text and will be what your visitors see. You can write a short descriptive text or use the name of the web site.
Web Address: enter the URL link of the web site or blog. Do remember to add the “http://” e.g.:
this is wrong: www.bloggers.com
this is right: http://www.bloggers.com
Description: the description will be visible to your visitors, try to make it short but informative. The description will display on mouse over or, when adding the widget, you can choose to display it together with the link.
Link Categories
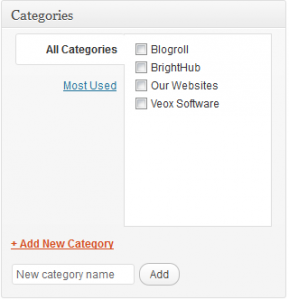 When making a new list of links for your blogroll, it’s useful to keep them organized in categories. In the “Categories” section, select the one you want, multiple categories can also be selected.
If you don’t have a category for your links yet, you can add a new one here by clicking on “+ Add New Category”, enter a name in the input field and click “Add“. The name you choose for the category will be used for the title of your blogroll.
Target
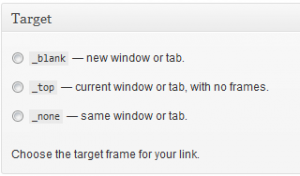 The setting in the target section, instructs the browser in which window the url opens.
- Choose “_blank” to open the target site in a new window or tab,
- Choose “_top” or “_none” to open in the same window or tab
“_top” and “_none” differ in that “_top” forces the browser out of any frames you may have on your site. If unsure, use “_top“.
Link Relationship
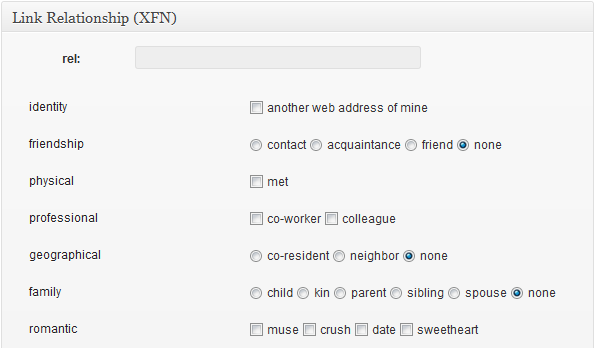
The Link Relationship section allows you to describe any relationship you may have to the blog or website to which you’re linking – maybe it’s an additional site that you own, the site of someone you know or someone in your area. Simply fill out the options by clicking the relevant radio or check boxes.
Advanced Blogroll Settings
Four more setting are in the advanced section allowing you to specify the url of a related image, a RSS feed link, a section for notes and your own personal rating for the link.
Finally
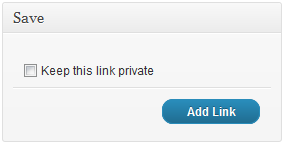 If you want to keep the link private, there’s an option for this inside the save section, simply select the “Keep this link private” option. Once all your settings are finished, click “Add Link”, your first new blogroll link is finished. Repeat the steps for each new link. When all your links are added, you’re now ready to make your blogroll roll.
Add your Blogroll to your Side Bar
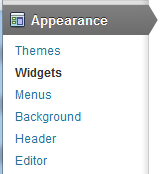 The availability of side bars and footers can vary depending on the theme that you use, this may range from just one widget in the side bar to multiple widgets in side bar and footer areas. Administration of available widget areas is displayed under “Appearance / Widgets”. Go to this area to add your new blogroll.
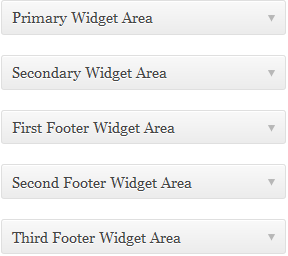
In the left hand side you’ll see “Available Widgets” area. This contains all the widgets that you can add to your widget areas. The Blogroll widget is called “Links”. Simply drag the title bar of this widget over to the widget area where you want it to be displayed. e.g. here I used the First Footer Widget Area:
 –»
–» 
Decide on your Blogroll Options
 The top drop down list of the widget contains a list of your “Link Categories”, select your new category from the list. The name you gave to the category will automatically be used for the blogroll title.
Available options for displaying your links are:
- Show Link Image
- Show Link Name
- Show Link Description
- Show Link Rating
You can select any or all of the options by clicking on the check boxes to customize your widget to display the way you want.
Nearly done. Click on the “Save” button at the bottom of the widget to save. Check now in the font end to make sure it’s displaying where and like you want. You can switch the settings and/or move the widget by dragging the title bar.
Changing the Title of your Blogroll
 The blogroll title is taken from the category name. If you want to change this simply open the “Link Categories” section, select the category to open it in edit mode, make your changes and save.
Any number of blogrolls can be created in WordPress. This gives you the chance to create theme related link collections so your visitors have a neat way to find info about topics that they’re looking for and, at the same time, build trust for your own blog.

 Create professional websites and online shops without programming:
